Start Blogging With Hugo, GitHub and Netlify
By this post, I start a series where I share my experience in how to start a journey as a blogger from a technical perspective. This tutorial will show you how to set up from scratch a blog using Hugo, GitHub and Netlify.
So, you decided to start blogging, and you need to set up a blog. But from where to start? It all depends on your technical skillset. If you are not a geeky person, maybe a better approach would be to use such blogging platforms as WordPress.com or Wix.com. But if you are skilled in software development or any other related field, creating your blog with Hugo, GitHub and Netlify is the way to go. What are the advantages of using the Hugo-GitHub-Netlify combination?
First of all, to create content, you will use Markdown, a lightweight markup language. It offers a simple formatting syntax and cross-platform portability. Also, you can use pure HTML within content written in Markdown.
Secondly, all your website content will be built with Hugo, an open-source static site generator. It provides excellent performance, numerous out-of-the-box features, fast built-in server reloads and plenty of themes to choose from.
Thirdly, using Netlify to deploy and host websites is simple and straightforward. Netlify offers a free tier plan, which is more than enough for any static website implemented with GitHub and Hugo. Netlify’s Continuous Deployment feature, in conjunction with GitHub, substantially helps in automating the content publishing workflow.
But enough talk, let’s get started. The tutorial below consists of the following steps: Basic knowledge of Git with its command-line interface and GitHub/Netlify accounts are the prerequisites for this tutorial. As a host operating system, I will be using Ubuntu 18.04.
Install Hugo
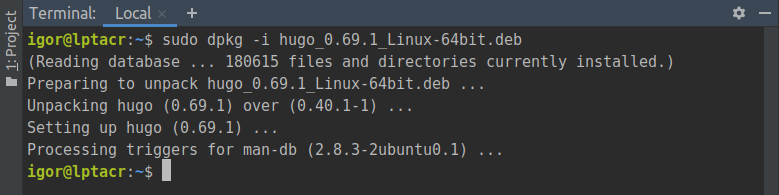
As per Hugo official documentation, using sudo apt-get install hugo command is not recommended because it will not install the latest version of Hugo. Indeed, you will get version 0.40.1 while the newest version at the moment of writing is 0.69.1. Therefore, download a .deb package from the official Hugo releases page and install it using the dpkg utility:
$ wget https://github.com/gohugoio/hugo/releases/download/v0.69.1/hugo_0.69.1_Linux-64bit.deb
$ sudo dpkg -i hugo_0.69.1_Linux-64bit.deb
Create New Site
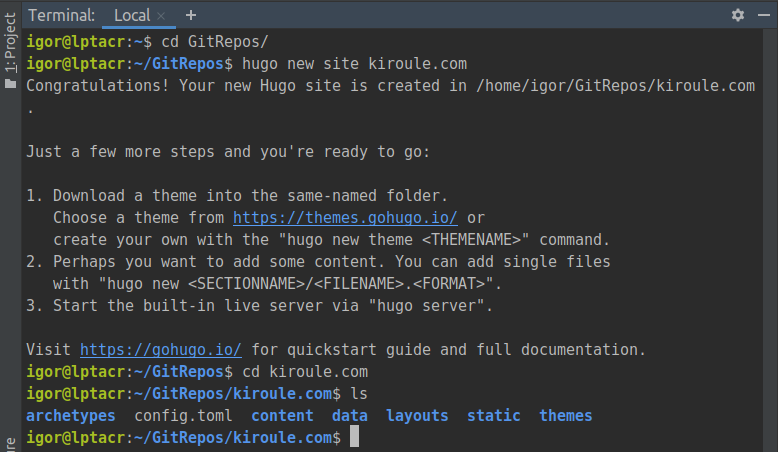
To create a new site, execute the hugo new site command in the site’s root directory, for example:
$ hugo new site kiroule.com
Here, I use kiroule.com as a site name since I already own this domain name, and I’m planning to set it up as a custom domain for my website. The newly created site has the correct structure but without any content or theme.
Before proceeding any further, you need to choose a Hugo theme. Hugo offers a plethora of themes that suit different tastes and needs. I picked Bilberry Hugo theme because it is suitable for blogging, responsive and multilingual. Also, it offers support for Disqus comments, Algolia search and Google Analytics.
Move to the site’s root directory and initialize a Git repository:
$ cd kiroule.com
$ git init
Then move to themes directory and add the theme in question as a Git submodule:
$ cd themes
$ git submodule add https://github.com/Lednerb/bilberry-hugo-theme.git
The git submodule add allows cloning of the theme repository to your project and keeping it as a subdirectory of the site repository. Also, it permits Netlify to recursively clone the site repository along with the theme repository when building and deploying the site.
Copy the content of the themes/bilberry-hugo-theme/exampleSite folder to the site’s root directory, remove the default archetype and move back to the site’s root directory:
$ cp -r bilberry-hugo-theme/exampleSite/* ../
$ rm ../archetypes/default.md
$ cd ..
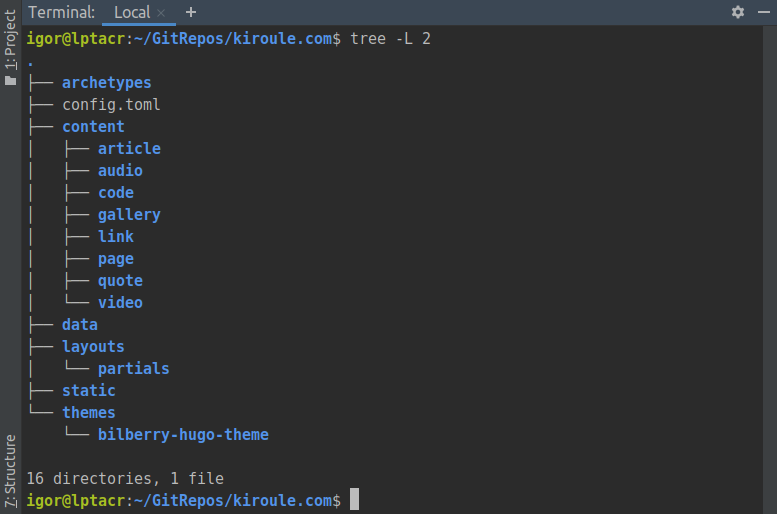
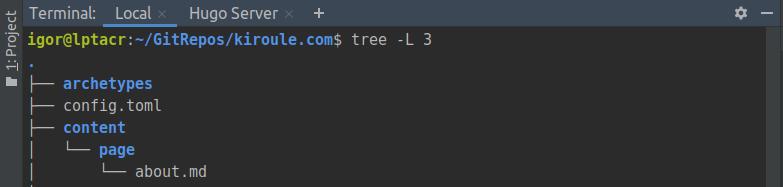
At this point, the site’s root directory structure should look like below, where content directory contains the content from the example site:
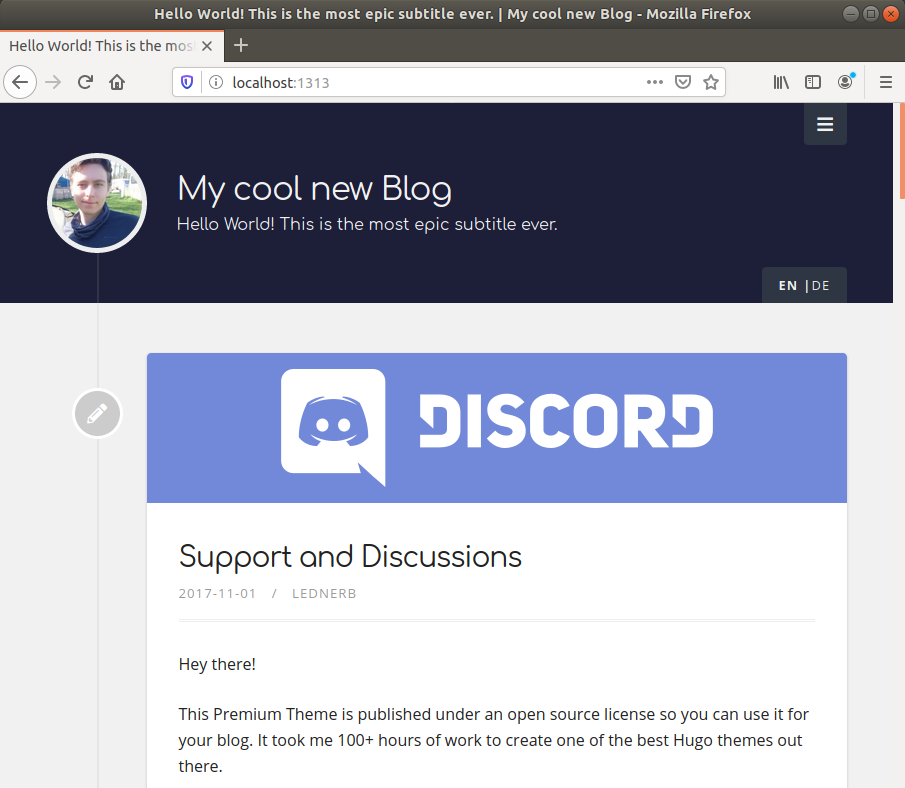
To start the built-in server to build and serve the site, execute the hugo server command from the site’s root directory:
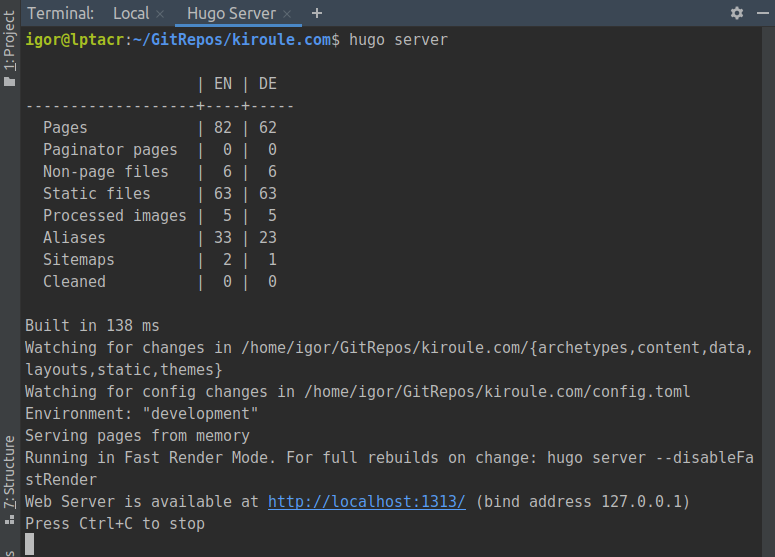
Access the site in your browser at http://localhost:1313. As you can see, the new site is simply a replica of the example site provided by the theme.
Customize Example Site
After making sure that the site can be built and served, let’s proceed with customizations. To do so, you need to configure settings according to your needs in the config.toml file, which Hugo uses as the default website configuration file. Please see Hugo documentation for more details on all available configuration settings.
The config.toml file should look like this after applying the following adjustments:
- Set new values to the
titlesetting andauthor,description,keywords,subtitle,socialMediaLinks,copyrightBy,copyrightUseCurrentYearandcopyrightUrlparams. - Set the
baseURLsetting tohttps://kiroule.netlify.app/wherekirouleis the name of the site when deployed on Netlify. When deploying for the first time on Netlify, a random name will be generated automatically, for example,awesome-mclean-11186c. Then the site name can be updated in theSite Detailssection. - Disable Google Analytics, Disqus comments and Algolia search by commenting out corresponding settings and params.
- Switch to English only language by setting
showHeaderLanguageChooserandshowFooterLanguageChooserparams tofalsevalue and removing the[Languages.de]params subsection. - Use a custom image instead of a gravatar for the header image. Copy the custom image to the
static/img/directory and set thecustomImageparam to the image’s path, for example,img/avatar.png.
Then, to get rid of the content that came along with the example site, delete everything inside content and resources directories.
Create About Page
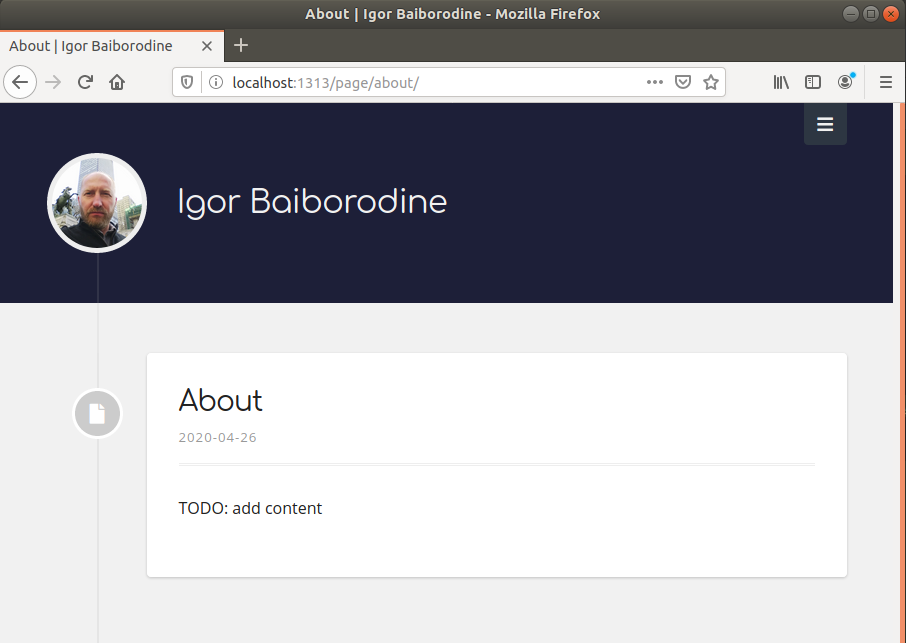
The next step is to create an empty About page. Use the hugo new command, for example:
$ hugo new page/about.md
Make sure you run it from the site’s root directory. Here, page/about.md is a path relative to the content folder.
The page part in the page/about.md path defines a post type that should map to one of the archetypes supported by the theme. The supported archetypes are defined by the theme in the themes/bilberry-hugo-theme/archetypes folder. Bilberry Hugo theme supports the article, audio, code, gallery, link, page, quote and video post types.
The content for the page/about.md file is generated according to the themes/bilberry-hugo-theme/archetypes/page.md template:
---
title: "About"
date: 2020-04-26T13:13:06-04:00
draft: true
excludeFromTopNav: false

# set the link if you want to redirect the user.
link: ""
# set the html target parameter if you want to change default behavior
target: "_blank"
---

TODO: add content
By default, Hugo’s built-in webserver automatically rebuilds the site if it detects any changes. Then it pushes the latest content to any open browser pages. But since the page/about.md file contains draft: true, you should restart the server with the --buildDrafts flag to include content marked as a draft.
Push Git Repository to GitHub
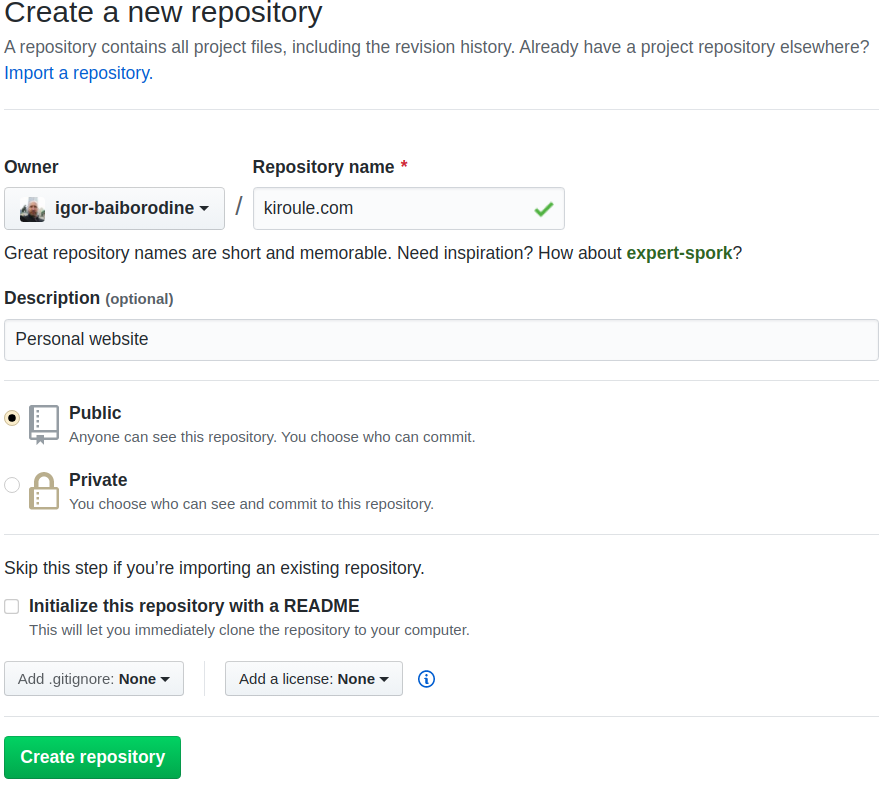
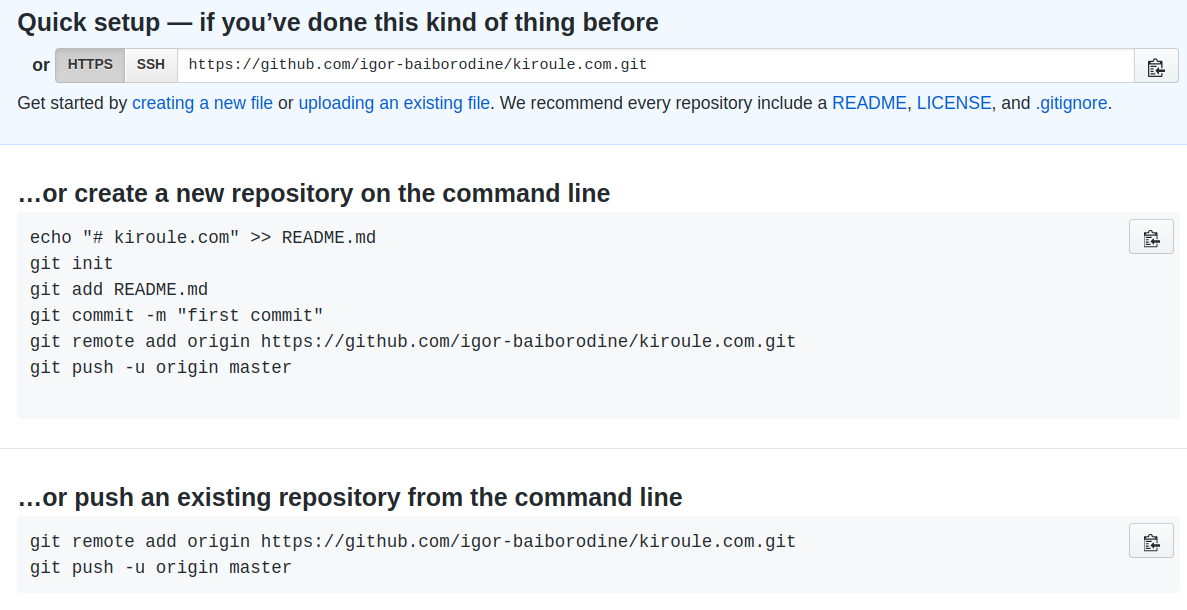
Create a new repository on GitHub without initializing README, license or .gitignore files.
Copy git remote add and git push commands from the ...or push an existing repository from the command line section:
Add changes to the staging area and commit them:
$ git add .
$ git commit -m "Initial commit"
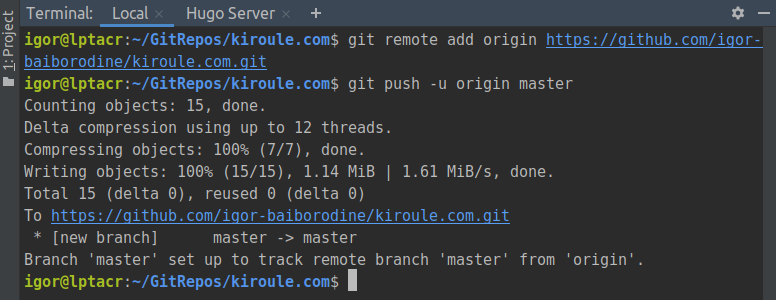
Then proceed with pushing your local Git repository to GitHub:
$ git remote add origin https://github.com/igor-baiborodine/kiroule.com.git
$ git push -u origin master
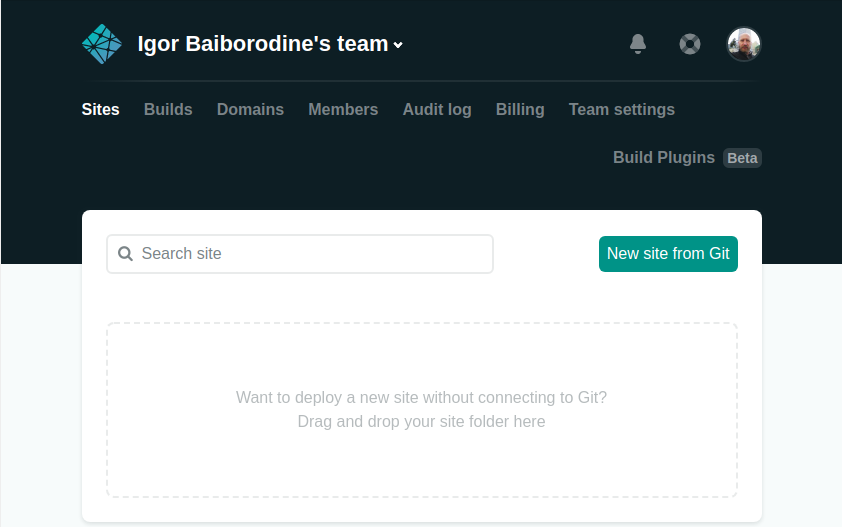
Deploy on Netlify
After signing in to Netlify, click on the New site from Git:
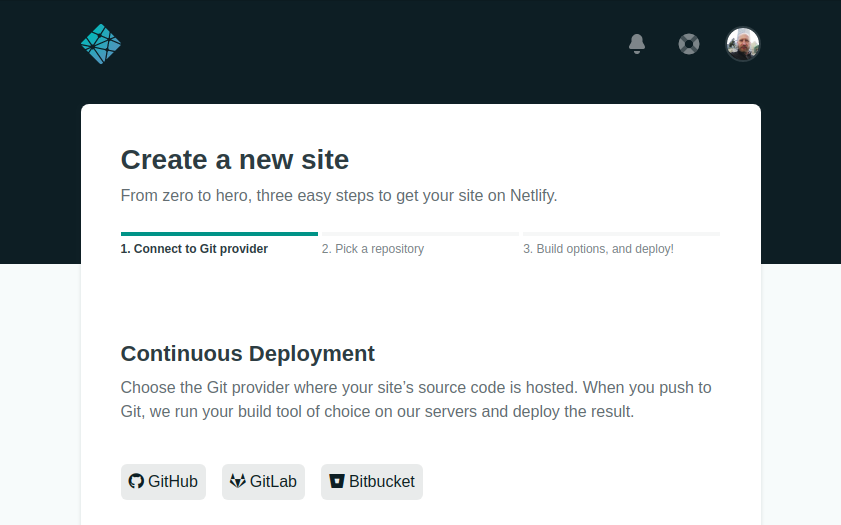
Then you will be prompted to choose the Git provider. Continue by clicking on the GitHub button:
The next step is to install Netlify on your personal GitHub account:
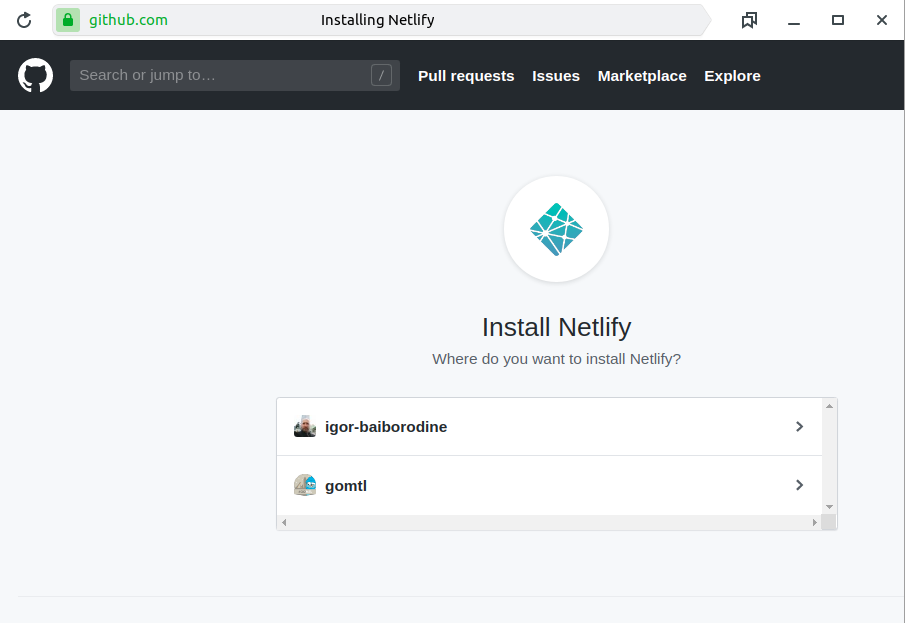
Select the site repository and continue with the installation:

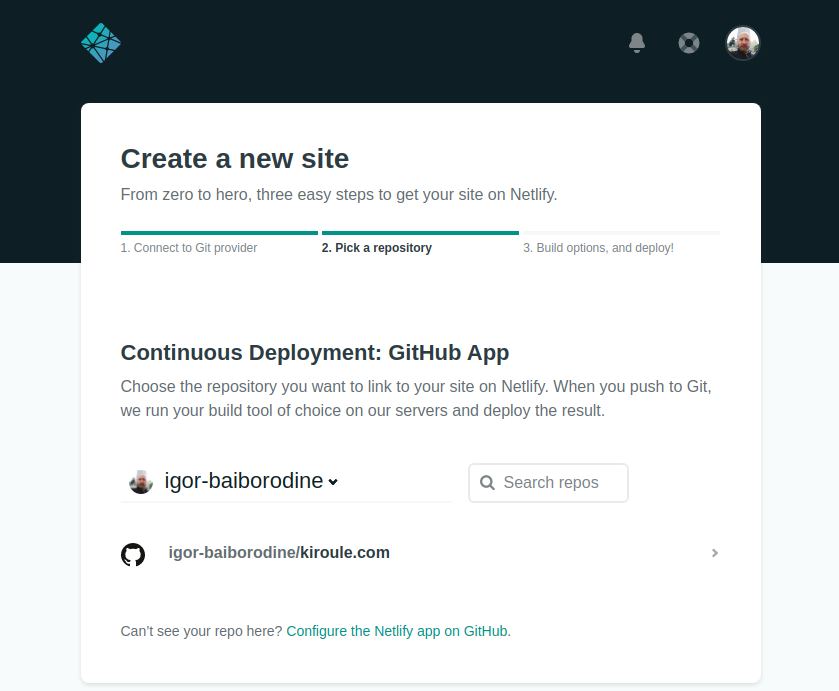
Pick the repository that you want to link to your site on Netlify:
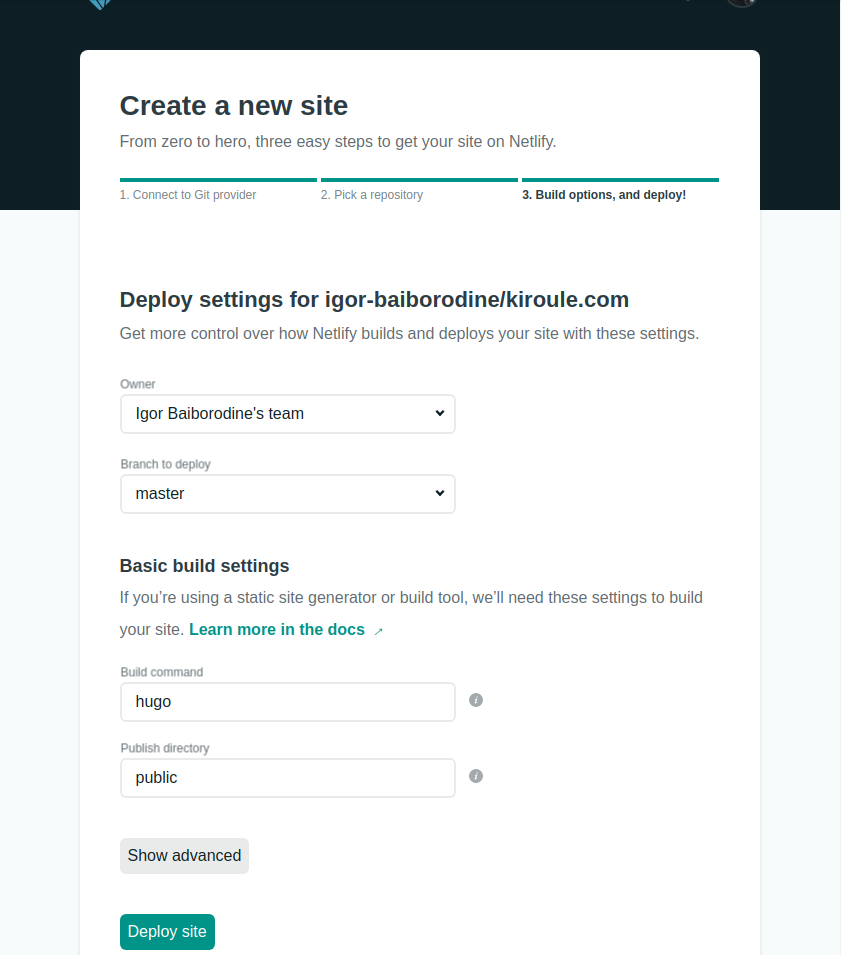
Verify deploy settings and continue by clicking on the Deploy site:
As soon as the build completes, you will be presented with the site overview:
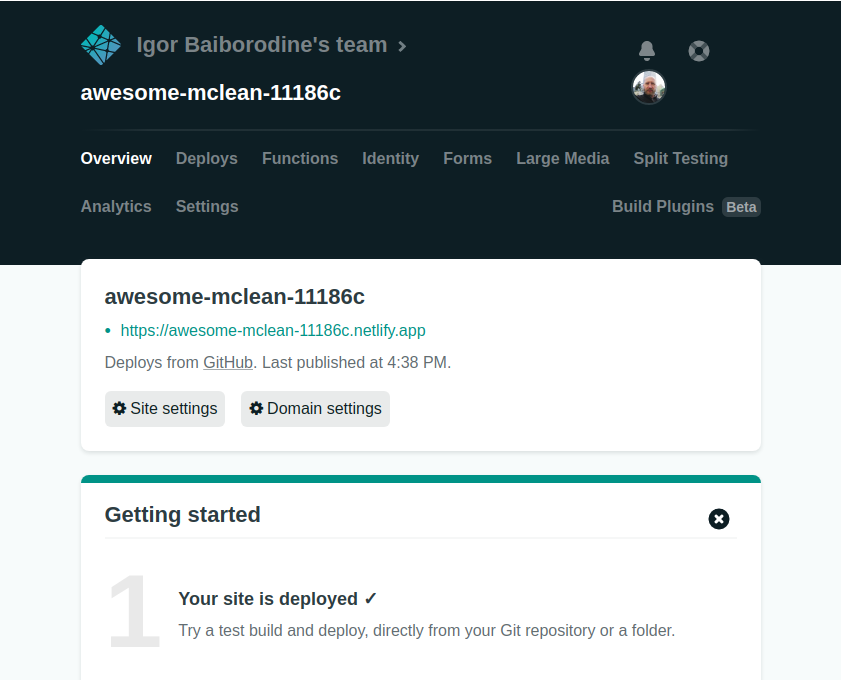
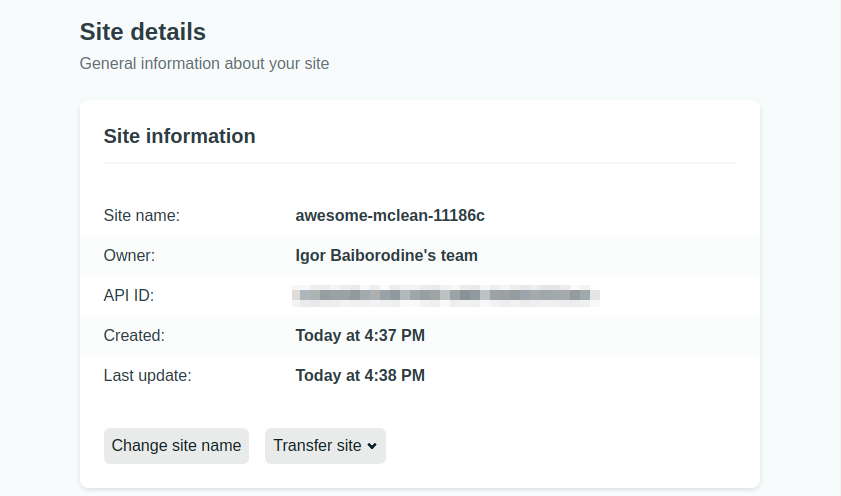
Your website will not be correctly displayed if you proceed to the URL shown in the site overview since it does not match the baseUrl setting value in the config.toml file. Therefore, click on the Deploy settings in the site overview. Then select the Site details under the General. In the Site details tab, click on the Change site name:
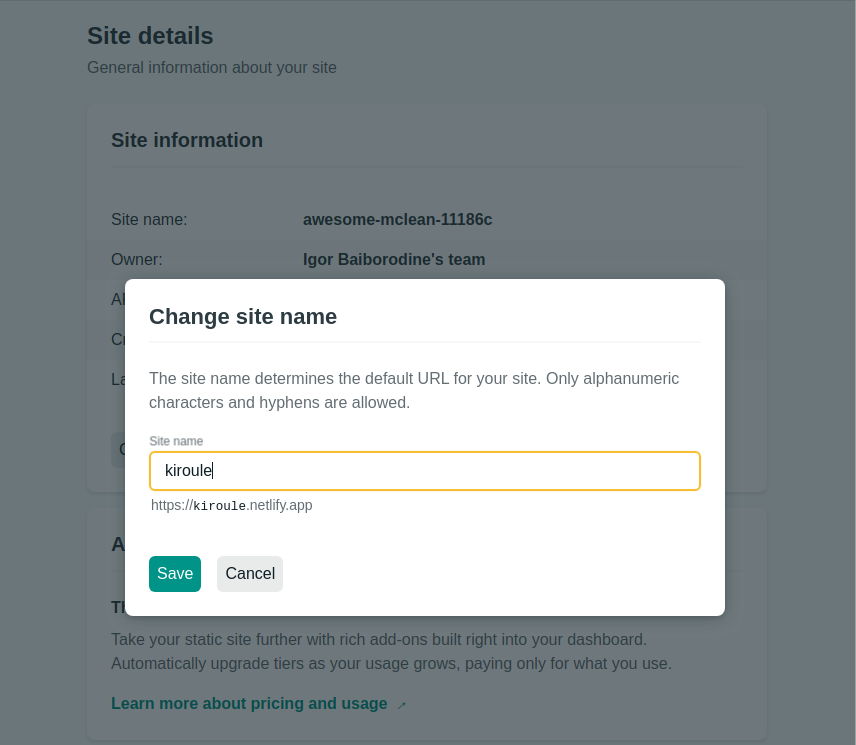
In the Change site name pop-up window, set the new site name and save it:
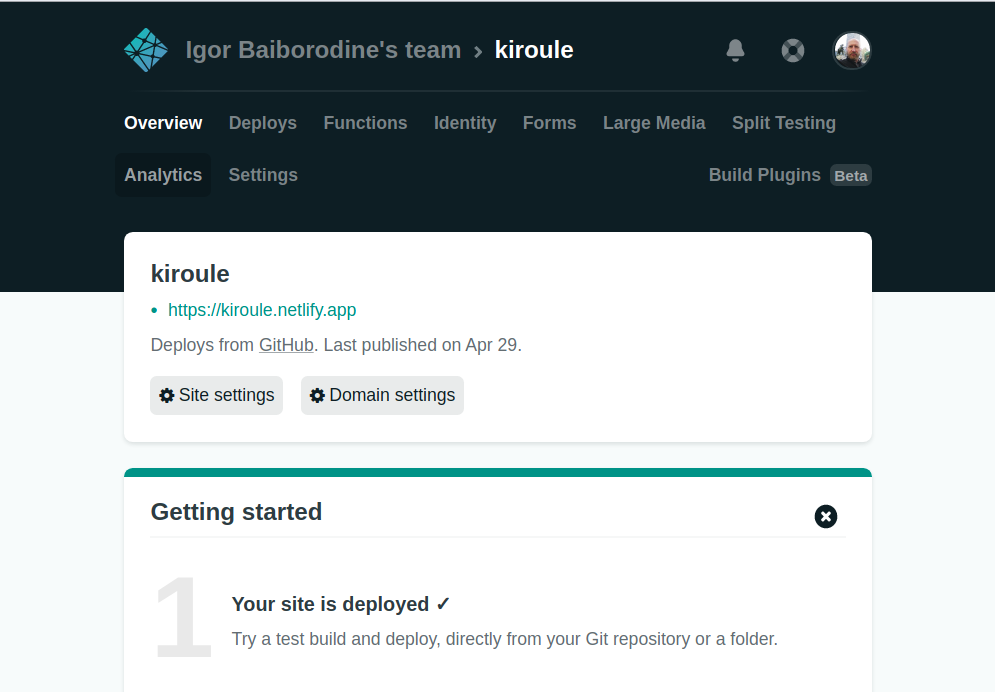
Now you can access your website at the URL shown in the site overview:
To conclude this tutorial, I want to add that it is my second attempt to start blogging. My first try was in 2016, but it didn’t go any further than creating an empty website. Back then, I used Jekyll and GitHub Pages to build and host the blog. I hope that my second attempt will be successful, and I will have enough time, focus, and energy to regularly publish new content.
Continue reading the series “Building Your Blog, the Geeky Way”:
- Start Blogging With Hugo, GitHub and Netlify
- Configure Custom Domain and HTTPS on Netlify
- Add Favicon to Hugo-Based Website
- Automate Data Upload to Algolia Index
- Manage Environment-Specific Settings for Hugo-Based Website
- Automate Data Upload to Algolia Index : Revisited
- Configure Custom Domain and HTTPS in Netlify : Revisited
- Use Aliases to Redirect Old URLs
- Automate Data Upload to Algolia Index with GitHub Actions